Do you have an evening routine that helps you wind down from a busy day? It is amazing how hectic our lives have become. I would love to make time for these exercises every night but I struggle for that much structure. For now this is a special gift to myself for those evenings when the stress of the day has crept my shoulders up to my ears and easing into sleep seems next to impossible. Every body is different and no exercise will work the same for each of us. Since we are not together, please, please, please pay extra attention to your body and discontinue any exercise if there is pain. Try these five exercises to let go of your day and ease into a good night asleep. (Tip: Read the entire article. Review the full description of each pose before attempting.)
The Approach
To “let go”, we use a yin approach. This is my quick overview of a Yin Yoga approach. To learn more check out Bernie Clark’s Yin Yoga.
- Come into the shape/pose.
- Wiggle around a bit. (Explore the pose.)
- Find your edge. (The place where you feel a little tension/sensation.)
- Build a fort for support. (Is part of your body “hanging” and creating muscle tension? Support it so muscles can release but maintain the edge.)
- Hangout awhile. (3-10 minutes – You may have to work up to that.)
- Let go. (Encourage yourself to “melt”. Feel tightness? Replace it with ease.)
The Props
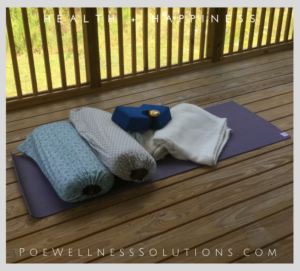
Although fancy yoga props are convenient and fun, most likely every thing you need is available in your home. Be creative! Books, rolled up blankets or towels and furniture are great props. The following is recommended.
- 2 bolsters (pillows, cushions, rolled up blankets, blocks, furniture)
- 2 blocks (books, pillows, cushions, rolled up blankets)
- 2 blankets (towels)
- timer (optional but very helpful)
- music (optional)
The Exercises
1. Supported Fish
 This is a great shape to let go of the day’s tension. Sitting at a desk encourages our shoulders to round forward and creep up to our ears. Enjoy opening up the chest and the belly, taking fuller breathes and allowing the shoulders to melt toward the floor.
Getting In
- Place bolster length-wise in alignment with your spine 1-2 fists width from you.
- Explore leg options.
- Feet together, knees wide
- Legs reaching long
- Other options that meet your needs
- Lie back on bolster (head supported).
- Explore arm options.
- Arms extended to sides aligned with shoulders
- Arms by sides
- Other options that meet your needs
- Relax muscles and melt into the shape.
Safety/Tips
- If there is pain in the lower back due to too much compression modify the back support (smaller bolster or rolled up blanket) or prop the head of the bolster at an angle to decrease the intensity.
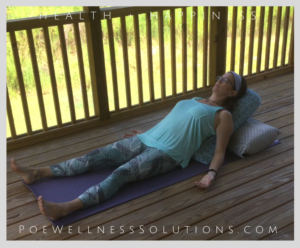
Bolster is propped at an angle to prevent too much compression in the lower back. - If there is pain in the neck due to too much compression place support under the neck.
- When knees are bent and out to the sides, place support under the knees to prevent the legs from “hanging”. Remember: Maintain the edge but prevent unnecessary muscle tightness. Let go!
- Adjust or exit the pose if any pain, tingling or numbness occur. There may be slight discomfort at your edge but there should be no pain.
Time In Position
3-5 minutes
Getting Out
Either slowly roll to your side and press up into a seated position or tuck chin to chest and roll up to seated.
Areas Impacted
Chest, abdomen, pelvis, lower back, neck
Meridians Stimulated
Lung, heart, intestines
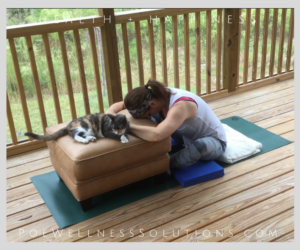
2. Butterfly (w/ wide legs)
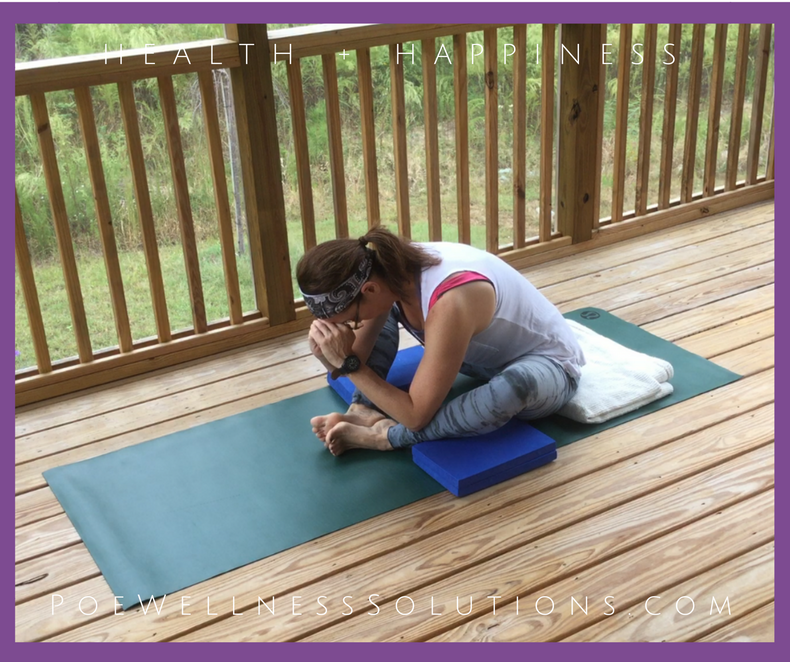
If you hold tension in your lower back, neck or belly this is a great solution. As you lengthen the lower back and neck you are also compressing the belly. As you slowly come out of the pose, prepare for a magical experience.
Getting In
- From sitting position, bend knees and slide feet towards the body.
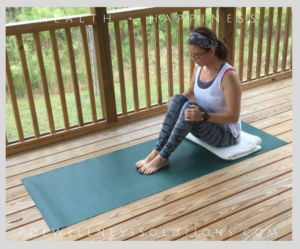
Bend knees & slide feet toward body. - Allow knees to drop out to the side.
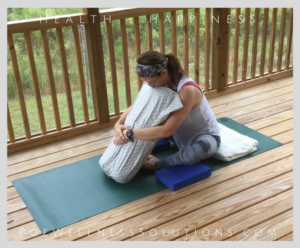
- Lean forward hinging from hips until you find your “edge”.
- Support torso and allow muscles to release. (NOTE: Although you are supported, you still feel your edge.)
- Head may hang heavy or be supported.
Safety/Tips
- Explore leg options.
- Feet closer to torso creates greater inner thigh sensations.
- Feet further from torso, encourages great involvement of hamstrings.
(NOTE: I prefer knees at about a 90 degree bend. Legs create a square.) - If outer thighs do not reach the floor support the legs with props.
- Sciatica may be aggravated. Pelvis should tilt forward. (NOTE: If the tilt of your pelvis is unclear to you, sit tall and explore rolling the top of your pelvis forward and backward.)
- Elevate pelvis by sitting on a folded blanket or prop.
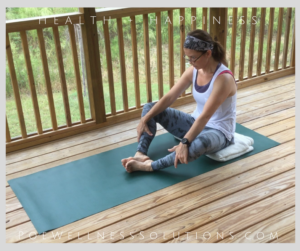
Explore tilting pelvis backward … 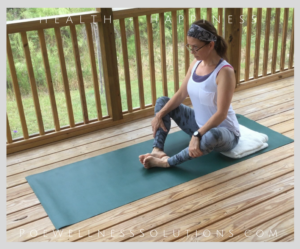
… and forward.
-
- If a lower back issue discourages spinal forward flexion, maintain a long spine and do not round forward. Use props to support your torso.
- Adjust or exit the pose if any pain, tingling or numbness occur. There may be slight discomfort at your edge but there should be no pain.
Time In Position
3-5 minutes
Getting Out
Use hands to push floor (or props) away. Slowly return to seated position. Lean back on hands to release hips and slowly straighten legs. Enjoy gentle movement or stillness before next pose.
Areas Impacted
Hips and lower spine. Pressure is placed on abdomen.
Meridians Stimulated
Gall bladder and urinary bladder
3. Deer Pose w/ a Twist
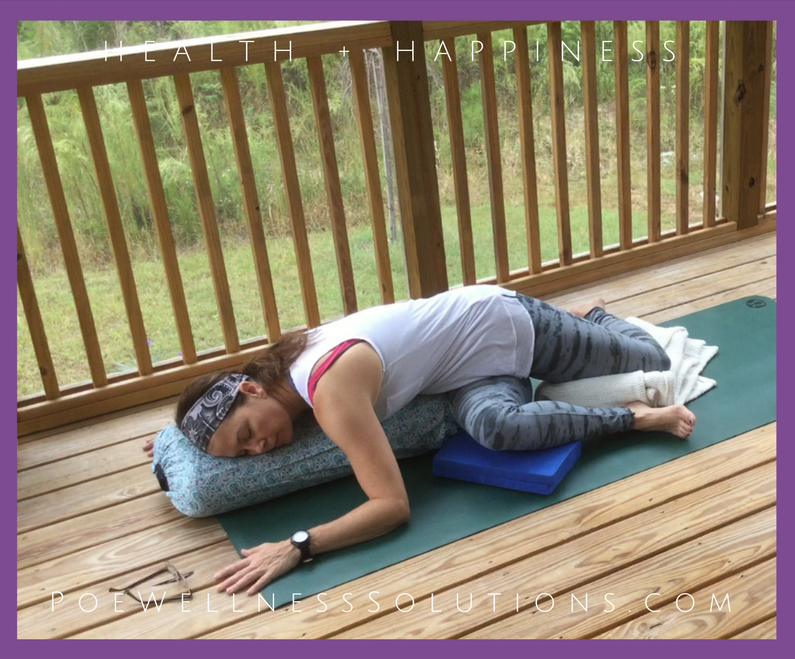
Twists assist in detoxifying the body. Have a toxic day? This may be the answer. Whenever I offer this pose in class, at least one person enjoys a quick nap. Check the time when you go into this shape. Notice if you catch a few zzz’s.
Getting In
- Begin by sitting in butterfly with a bolster to your left.
- Swing the right foot behind the right hip.
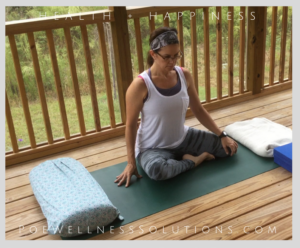
Swing the right foot behind the right hip. Attempt to ground both sitting bones.
- Explore leg options.
- Start with feet close to body.
- Play with skooching feet away from body. Typically the further the legs are from the body the more intense the sensation in the hips. Use props to support areas not in contact with the mat.
- Find your edge.
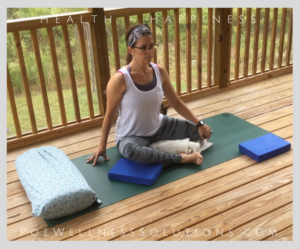
Explore leg options. Use props to support areas not in contact with the mat. Sit tall.
- Sit tall. Relax through the pelvis/hips. Enjoy several breaths.
- Reach the crown of the head toward the ceiling. Place right hand outside the left knee and the left hand behind the body. Gradually begin to twist.
- Explore the twist. Take your time to ease in and out of the twist.
- Inhale lengthen torso. Exhale deepen or relax into twist.
- Tilt pelvis forward and backward like we did in butterfly.
- Be gentle. This is not a competition. 🙂
7. Slowly walk your hands along side the bolster.
8. Lengthen through the torso as you snuggle into the bolster.
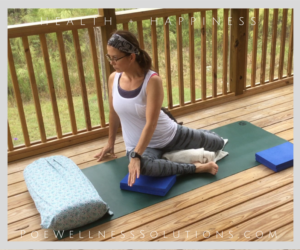
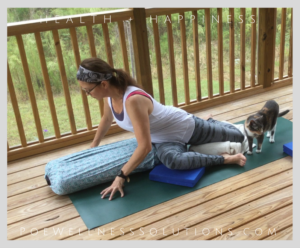
9. Begin with face to the front. With time your neck may release and allow your gaze to turn to the bolster or to the back.
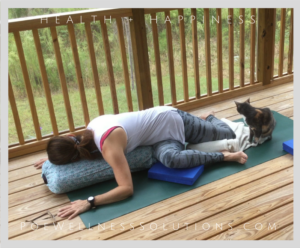
10. Allow your body to be heavy. Relax into the shape.
11. Repeat on other side.
Safety/Tips
- Placement of feet/legs/knees and grounding sitting bones is a challenge. Continue to explore.
- There is no such thing as a knee opener. If you feel pain in either knee (most likely the knee bending back toward the hip) straighten the leg and continue with the pose.
- Don’t rush into the twist. Allow the pelvis to release a bit.
- As you drape your torso onto the bolster, the hip away from the bolster will lift from the floor. That’s okay.
- Do not push into the twist but relax.
- If the twist is too intense, prop the head end of the bolster at an angle.
- Adjust or exit the pose if any pain, tingling or numbness occur. There may be slight discomfort at your edge but there should be no pain.
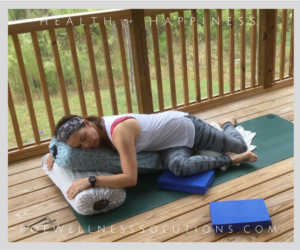
If too intense, prop the head of the bolster.
Time In Position
3-5 minutes
Getting Out
Slowly exit the pose. Return gaze to the front. Press hands into the floor. Return to seated position. Extend both legs in front of body. Find movement or stillness that makes sense for your body.
Areas Impacted
Hips and spine
Meridians Stimulated
Gall bladder, liver and kidney, possibly stomach and spleen
4. Legs Up The Wall
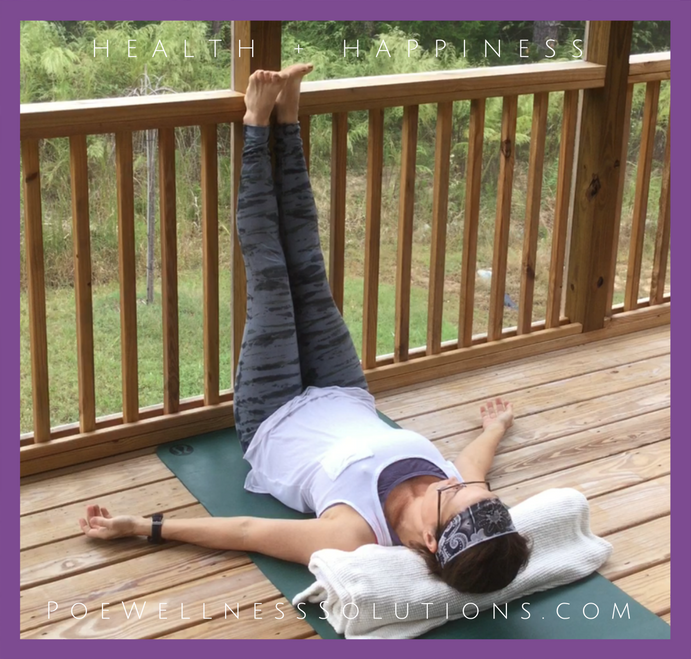
Oh what a feeling!! Some of my clients refuse to start or end a class any other way. If you are on your feet all day, it’s like setting a “refresh” button. Imagine any remaining tension washing down your legs, through your torso, out the top of the head and released for a restful sleep.
Getting In
- Sit with the a small distance between the side of your body and the wall.
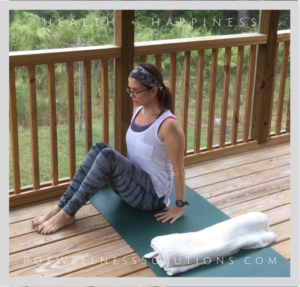
Sit close to the wall with knees bent. - Swivel on your bum bringing your back to the floor and legs up the wall.
- Skooch your bum as close to the wall as comfortable.
- Explore arm options.
- Along sides of body
- Out at shoulder level
- Resting hands on belly
- Resting beyond head
- Let yourself be supported by the wall, floor, and props. Let go of your day. Take several deep breathes and enjoy not having to do anything.
Safety/Tips
- It may take practice to figure out the swivel move and your preferred distance from the wall. No worries. Remember: We call this “practicing” yoga.
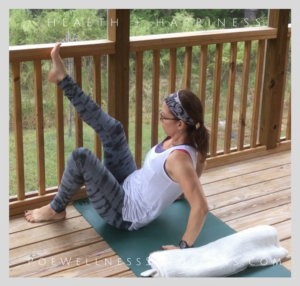
Swivel on your bum and reach legs up the wall. - This is a relaxing pose. If you feel an intense stretch, you will not relax. Explore the propping options to replace tension with ease.
- For tension due to tight hamstrings or lower back, skooch away from the wall or place a folded blanket at the lower back/sacrum.
- If feeling tension in the neck, support the head with a folded blanket or pillow.
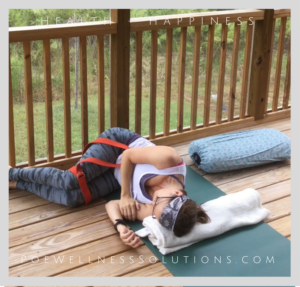
- When I am really tired from being on my feet all day, it is challenging to keep my legs up the wall. Try these options if needed …
- Strap the legs together. This takes away all your effort.
- Let the legs fall where the like (i.e., legs slide wide, knees bend and feet slide down wall into a squat, etc.)
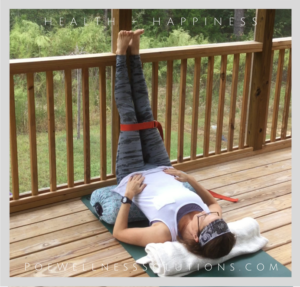
Legs braced with strap and lower back supported with bolster. Hands on belly.
- Adjust or exit the pose if any pain, tingling or numbness occur. There may be slight discomfort at your edge but there should be no pain.
Time In Position
3-10 minutes ~ It may take time to work up to holding this pose. If your feet begin to tingle exit the pose.
Getting Out
Allow the feet to slide down the wall and knees to bend to the chest. Slowly role to your side and enjoy a few breaths. Press up to a seated position.
Areas Impacted
Great stress reliever. Reduces swelling and fatigue in legs.
Meridians Stimulated
Urinary bladder
5. Savasana
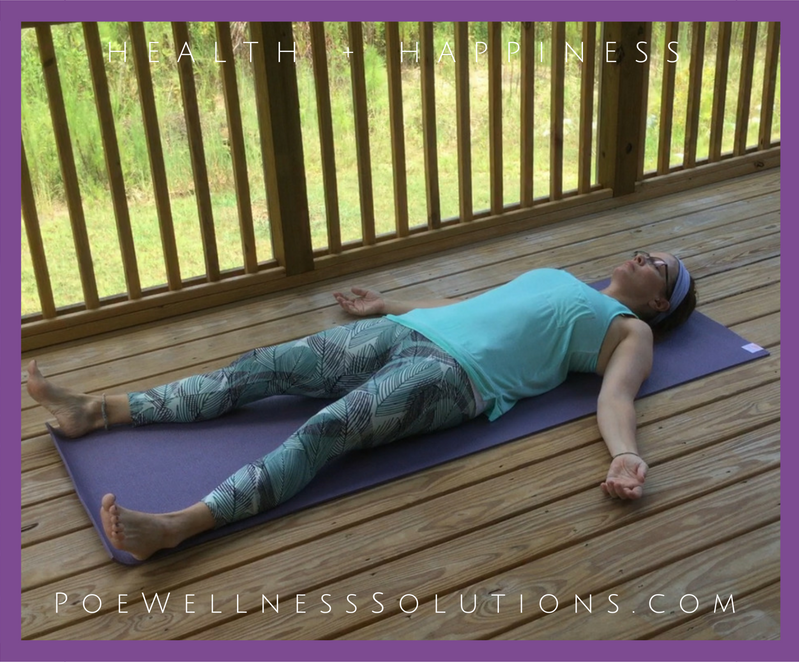
If you would like to take a traditional savasana on the floor … Go For It! I recommend climbing into bed and savasanaing your way to sleep.
Getting In
- Lie on your back.
- Relax shoulders away from ears.
- Extend arms by your sides, palms up allowing the shoulder blades to lie flat.
- Lengthen back of the neck by slightly tucking the chin toward the chest.
- Gently rock your head from side to side to balance weight on the back of your head.
- Move legs apart wider than hips.
- Explore the shape. Wiggle around. Let go.
Safety/Tips
- Allow the body to relax and feel heavy.
-
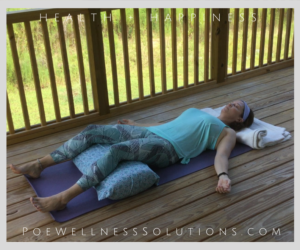
Release tension by placing support at the neck or under the knees. If tension persists in the lower back, bend and support knees.
- Possibly support your head/neck with pillow or rolled blanket.
- Adjust or exit the pose if any pain, tingling or numbness occur.
- If relaxation has adverse effects (anxiety, panic, drop in blood pressure, dizziness, etc.) seek assistance.
- Check with with health care professional before beginning a yoga practice if you are on medications that could impact your response to the practice.
Time In Position
Maintain shape 5-10 minutes. If you decided to enjoy savasana in bed, recommended time in position is 8 hours.
Getting Out
Deepen your breath. Bring movement to fingers and toes and maybe roll your head side-to-side. Notice the movement your body wants. Gradually make larger movement. Shift to your side for several breaths and then to a seated position.
Areas Impacted
- Full body relaxation
- Mind relaxed but aware of the body and paying attention to energy flowing within the body
Meridians Stimulated
No stimulation but a time for body and nervous system to assimilate impact of other poses. This is when it all comes together.
Summing It Up
This post is part of a series addressing the benefits and challenges of Yin Yoga. The focus has been letting go of the tension of your day and easing your way to sleep. A Yin practice has physical, emotional, mental and energetic impacts. As with any exercise, pay attention to how you feel. Your body is providing you with a wealth of information. Enjoy exploring all that you can learn about you!
Interested in learning about the Yin experience from Yin practitioners? Check out Yin Yoga: Everything You Need To Know For Success.
Learn additional Yin poses in these posts: Get Up On The Best Side Of The Bed – 4 Morning Yin Yoga Poses and 4 Simple Exercises To Melt Away Lower Back Pain.
If you find your mind particularly busy during a Yin posture check out This Is How To Win The Mindfulness Struggle or Five Simple Steps to the Hidden Truth about Mindfulness. Your Yin practice is a great place to work on calming your monkey mind.
Let us know what else you would like to know about Yin Yoga.

I can not sleep recently and this post is so useful. I will follow the instructions to have a good sleep at night. Thanks so much for sharing!
Hi Vivian,
You are very welcome! Good sleep is critical for good health. I am happy to know you are finding Yin Yoga helpful. Please let me know if you have any questions.
Happy Sleeping!
meg