Every back is different and no exercise works the same for every body. Since we are not together, please, please, please pay extra a ttention to your body and discontinue any exercise if there is pain. Let’s enjoy four exercises and melt away lower back pain. (Tip: Read the entire article. Review the full description of each pose before attempting.)
The Approach
To “melt”, we use a yin approach. This is my quick overview of a Yin Yoga approach. To learn more check out Bernie Clark’s Yin Yoga.
- Come into the shape/pose.
- Wiggle around a bit. (Explore the pose.)
- Find your edge. (The place where you feel a little tension/sensation.)
- Build a fort for support. (Is part of your body “hanging” and creating muscle tension? Support it so muscles can release but maintain the edge.)
- Hangout awhile. (3-5 minutes – You may have to work up to that.)
- Let go. (Encourage yourself to “melt”. Feel tightness? Replace it with ease.)
The Props
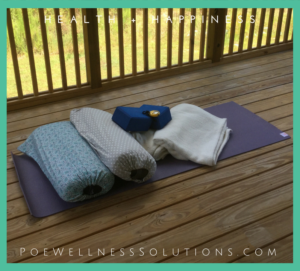 Although fancy yoga props are convenient and fun, they are not required to reduce lower back pain. Most likely every thing you need is available in your home. Be creative! The following is recommended.
- 2 bolsters (pillows, cushions, rolled up blankets, blocks)
- 2 blocks (books, pillows, cushions, rolled up blankets)
- 2 blankets (towels)
- timer (optional but very helpful)
- music (optional)
The Exercises
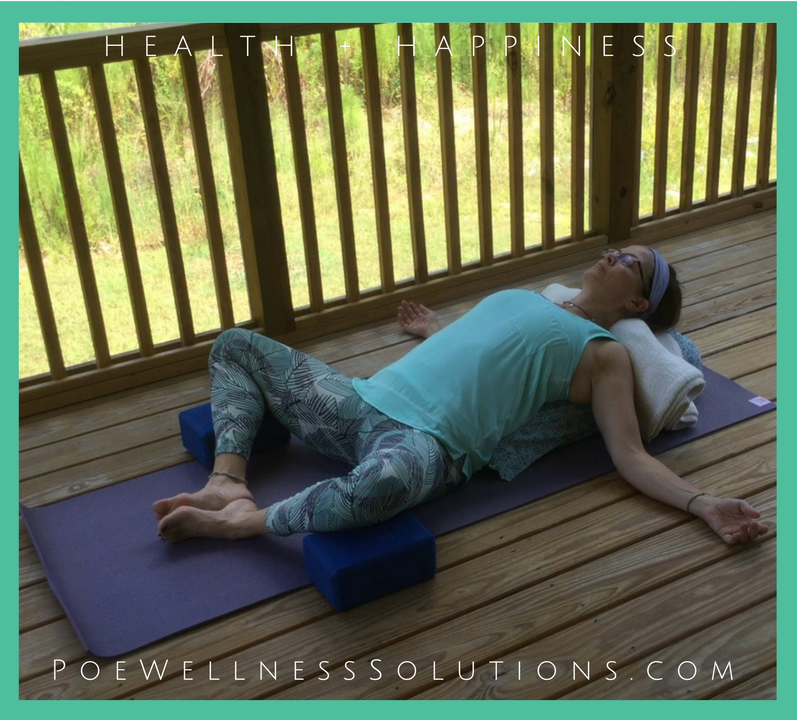
1. Supported Fish
Getting In
- Place bolster length-wise in alignment with your spine 1-2 fists width from you.
- Explore leg options.
– Feet together, knees wide
– Legs reaching long
– Other options that meet your needs - Lie back on bolster (head supported).
- Explore arm options.
– Arms extended to sides aligned with shoulders
– Arms by sides
– Other options that meet your needs - Relax muscles and melt into the shape.
Safety/Tips
- If lower back is increased due to too much compression modify the back support (smaller bolster or rolled up blanket) or prop the head of the bolster at an angle to decrease the intensity.
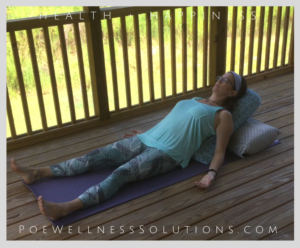
Bolster is propped at an angle to prevent too much compression in the lower back. - If there is pain in the neck due to too much compression place support under the neck.
- When knees are bent and out to the sides, place support under the knees to prevent the legs from “hanging”. Remember: Maintain the edge but prevent unnecessary muscle tightness. Let go!
- Adjust or exit the pose if any pain, tingling or numbness occur. There may be slight discomfort at your edge but there should be no pain.
Getting Out
Either slowly roll to your side and press up into a seated position or tuck chin to chest and roll up to seated.
Areas Impacted
Chest, abdomen, pelvis, lower back, neck
Meridians Stimulated
Lung, heart, intestine
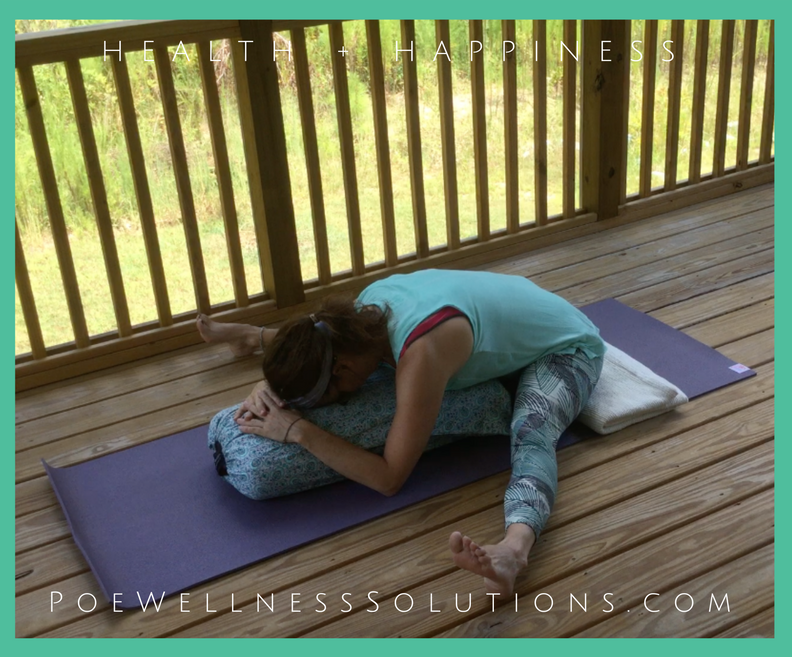
2. Straddle/Dragonfly
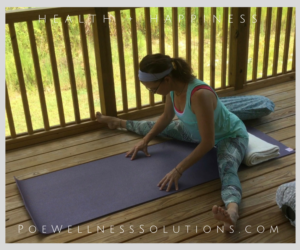
Getting In
- From a sitting position, reach legs as far apart as comfortable.
- With hands in front of your torso, walk hands forward until you find your “edge”.
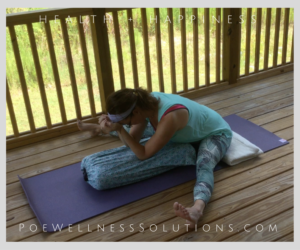
- Explore the shape. Wiggle around. Snuggle forward.
- Support your torso and allow the muscles to release. (NOTE: Although you are supported, maintain your edge.)
Safety/Tips
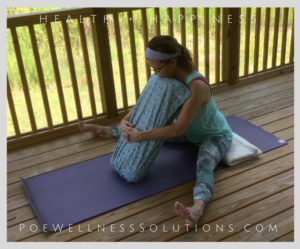
- If the pelvis tilts back and your lower back rounds forward, sciatica may be aggravated. Sit on a folded blanket or block to encourage the pelvis to tilt forward.
- If lower back issues discourage spinal forward flexion, maintain a long spine and do not round forward. Use props to support your torso.
- If knee tension develops, bring legs closer together.
- If hamstrings are too tight to fold forward, place support under bent knees.
- Adjust or exit the pose if any pain, tingling or numbness occur. There may be slight discomfort at your edge but there should be no pain.
Support weight of head with hands or a block if shape becomes too intense.
Getting Out
Role up to sitting. Bend knees. Place feet mat width apart. Windshield wiper knees side-to-side.
Areas Impacted
Hips, lower back, knees
Meridians Stimulated
Urinary bladder, Liver, Kidney, Spleen
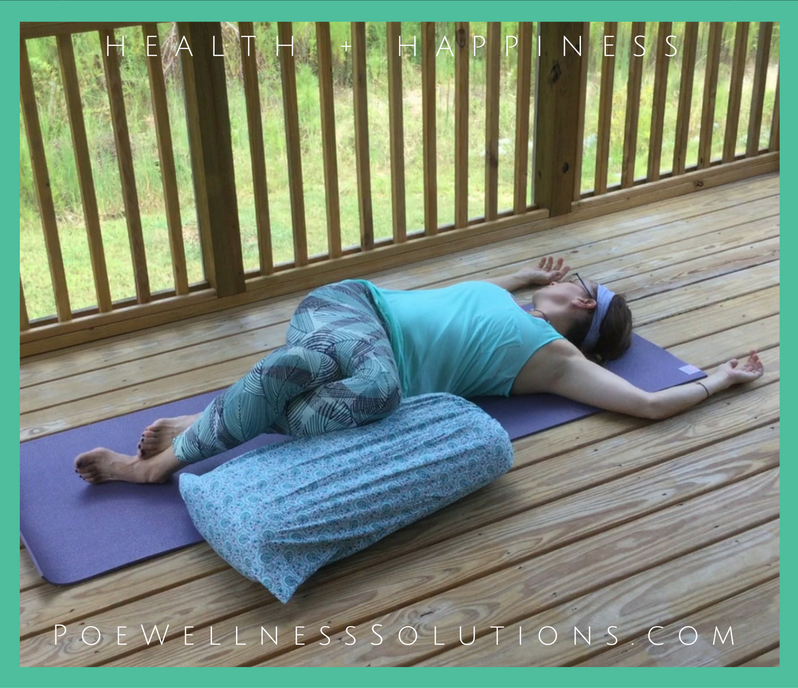
3. Reclined Twist/Twisted Root
Getting In
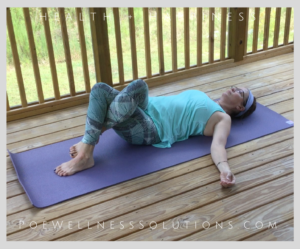
- Lying on back, bend knees, place feet flat to the floor.
- Cross right knee over left knee. (Option: Wrap right foot around the left lower leg.)
- Shift hips slightly to the right.
- Lower knees to left while keeping right shoulder in contact with the mat.
- Explore twist. (Gently press shoulders into the mat. Tilt pelvis front-to-back and side-to-side.)
- Relax muscles and melt into the shape.
- Repeat on other side.
Safety/Tips
- Do not push into the twist but relax.
Support head/neck to relieve neck stress. To reduce intensity, do not wrap legs. - Use props to support knees or shoulders that do not reach or stay in contact with the floor.
- Skooch around. Move knees closer or further from torso. Shift arms from along side torso to beyond head. Turn gaze from side-to-side.
- If there is neck discomfort, support head with a blanket.
- To decrease intensity, do not cross knee-over-knee.
- Adjust or exit the pose if any pain, tingling or numbness occur. There may be slight discomfort at your edge but there should be no pain.
Getting Out
Slowly roll to your back. Bend knees. Place feet mat width apart. Windshield wiper knees side-to-side. Hug knees to chest. Enjoy a full-body stretch.
Areas Impacted
Shoulder joint, upper & lower spine depending on placement of knees, possibly lumbar and sacroiliac joints
Meridians Stimulated
Lung, heart, intestines
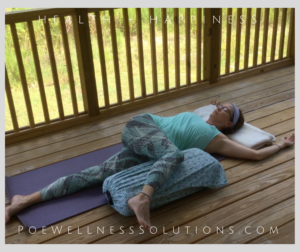
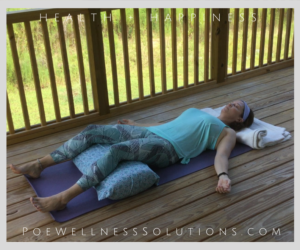
4. Savasana
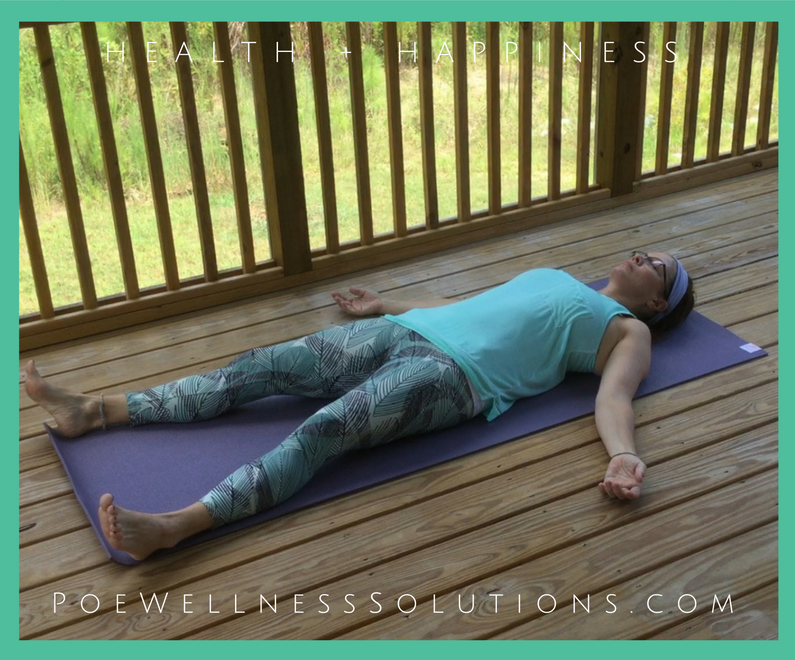
Getting In
- Lie on your back.
- Relax shoulders away from ears.
- Extend arms by your sides, palms up allowing the shoulder blades to lie flat.
- Lengthen back of the neck by slightly tucking the chin toward the chest.
- Gently rock your head from side to side to balance weight on the back of your head.
- Move legs apart wider than hips.
- Explore the shape. Wiggle around. Let go.
- Maintain shape 5-10 minutes.
Safety/Tips
- Allow the body to relax and feel heavy.
- If tension persists in the lower back, bend and support knees.
- Possibly support your head/neck with pillow or rolled blanket.
- Adjust or exit the pose if any pain, tingling or numbness occur.
- If relaxation has adverse effects (anxiety, panic, drop in blood pressure, dizziness, etc.) seek assistance.
- Check with with health care professional before beginning a yoga practice if you are on medications that could impact your response to the practice.
Getting Out
Deepen your breath. Bring movement to fingers and toes and maybe roll your head side-to-side. Notice the movement your body wants. Gradually make larger movement. Shift to your side for several breaths and then to a seated position.
Areas Impacted
- Full body relaxation
- Mind relaxed but aware of the body and paying attention to energy flowing within the body
Meridians Stimulated
No stimulation but a time for body and nervous system to assimilate impact of other poses. This is when it all comes together.
Summing It Up
This is the first in a series of posts addressing the benefits and challenges of Yin Yoga. These four simple poses release tension and reduce lower back pain. A Yin practice has physical, emotional, mental and energetic impacts. As with any exercise, pay attention to how you feel. Your body is providing you with a wealth of information. Enjoy exploring all that you can learn about you!
Interested in learning about the Yin experience from Yin practitioners? Check out Yin Yoga: Everything You Need To Know For Success.
You may also enjoy Trouble Sleeping? 5 Yin Poses That Will Ease You To Sleep and Get Up On The Best Side Of The Bed – 4 Morning Yin Yoga Poses.
If you find your mind particularly busy during a Yin posture check out This Is How To Win The Mindfulness Struggle or Five Simple Steps to the Hidden Truth about Mindfulness. Your Yin practice is a great place to work on calming your monkey mind.
Let us know what else you would like to know about Yin Yoga.
Meg,
Thanks for breaking everything down into easy steps to follow. I have been intimidated in the past by trying a new yoga position for fear of doing it wrong. I loved how you showed alternatives and how to use the props to help you find the edge. I find that it is hard for really let go while looking at a timer. So instead I hold a pose for the duration of a song. I feel mindful and my low back feels happy.
Thanks Again
HI Sarah,
Holding a pose for a song … such a great idea! You are not anticipating an alarm but enjoying a song. Have fun exploring new poses. If you listen to your body and pay attention to what you feel (avoid pain) then I believe you can let go of your fear of doing it wrong.
Have fun and let me know if you have any questions.
In H+H,
meg
Hello Meg,
Nice post from you. It’ll help us to achieve the health goal. Thanks for sharing….
Hi Sofia,
Thank you for the comment and kind words. Always great to find ways reach our goals … especially when the steps are simply letting go.
In Health + Happiness,
meg
Thank you for such vital post !
Hi Meg,
My wife has been lately suffering from severe back pain. She has tried a lot of painkillers but none of them seem to give an everlasting relief.
The exercises you have enlisted, seem to a lot effective. I will definitely share your post with her and recommend these to her.
Thank you once again.
Looking forward for more such posts from you,
Regards,
Jerry
Hi Jerry,
Hate to hear about your wife’s back pain. It’s a challenge to know if these are the best exercises for her. I am fan of trying new things to let go of tightness and reduce pain. Encourage her to proceed with caution and pay lots of attention to how she feels. Exit the exercise if she experiences increased pain. Thanks for your kind words about this post. I look forward to sharing more in the future.
In Health + Happiness,
meg
Yes definitely Meg.
Thank You for your motivating words.
I will go by your advice and I believe it would benefit my wife 🙂
Regards,
Jerry
Valuable info. Fortunate me I discovered your site accidentally, and I am
shocked why this coincidence didn’t happened in advance!
I bookmarked it.
Hi Lipotrim Review,
Glad to know the information is helpful. Additional Yin posts are in the works. It is by far my favorite yoga. The act of letting go and not doing is incredibly refreshing (and challenging) as a balance to a busy, doing lifestyle.
Thank you for bookmarking. Hope to provide more valuable information soon.
In Health + Happiness,
meg